The Course
Scotscraig was designed by Old Tom Morris and later redesigned with the assistance of James Braid, and though the course has been carefully modernised for today’s game, it still retains the original architectural intent.
Scotscraig has a character like no other course, blending traditional Scottish links with heathland, and offers a fair but demanding test, with greens that play firm and fast when conditions allow. The 4th hole, Westward Ho, features a raised knoll green, a design that would later influence classic strategic templates in golf architecture.

Hole 1: Admiral
With the prevailing wind typically against, plus out of bounds and trouble up the right, keep your opening shot up the left half of the fairway to avoid being disheartened straight out of the gate. Your second shot should favour the right half of the green as the natural slopes will kick your ball left, leaving a tricky up and down from below the green.
| Par | Yards | S.I |
|---|---|---|
| 4 | 402 | 9 |
| 4 | 402 | 9 |
| 4 | 384 | 9 |
| 4 | 376 | 9 |
Hole 2: Wood
Aim to position your tee up the left side; laying up short of the bottle neck is the best way to stay clear of the wood to your right. Land your approach shot around the front of the green, as you will always get a helpful bounce forward from a green that slopes front to back. Be mindful of the nasty bunker lurking at the back of the green.
| Par | Yards | S.I |
|---|---|---|
| 4 | 407 | 15 |
| 4 | 374 | 15 |
| 4 | 364 | 15 |
| 4 | 357 | 11 |
Hole 3: Gully
A demanding par 3 early in your round. Your line is the right edge of the gorse behind the green, which will open up the green for your long approach. Avoid the bunkers that guard the large putting surface and you’ll have a great look at par… take the par and run!
| Par | Yards | S.I |
|---|---|---|
| 3 | 214 | 13 |
| 3 | 214 | 13 |
| 3 | 201 | 13 |
| 3 | 194 | 7 |
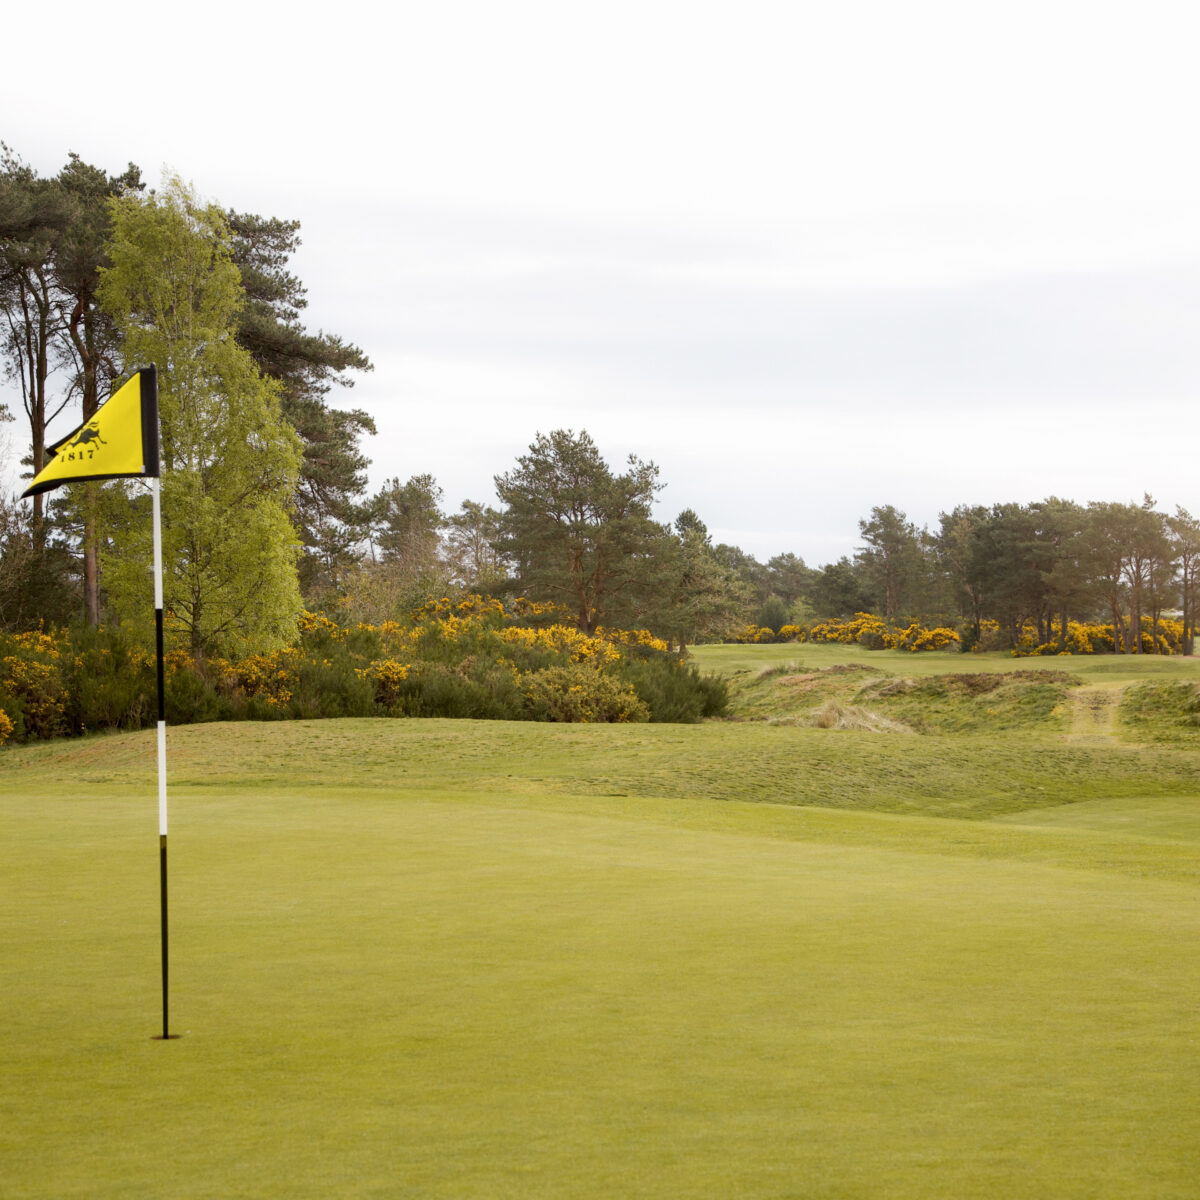
Hole 4: Westward Ho
The signature hole at Scotscraig is short in yardage but tricky in play, with this dogleg right par 4. Lay your tee shot between the three fairway bunkers before you decide how to approach this raised green. Two pot bunkers await wavering shots and steep slopes will kick your ball wayward. Treat your put with care on this undulated green.
| Par | Yards | S.I |
|---|---|---|
| 4 | 362 | 1 |
| 4 | 362 | 1 |
| 4 | 347 | 1 |
| 4 | 340 | 1 |
Hole 5: Whins
This testing par 4 requires an accurate tee shot, ideally up the left half. Keep an eye on the bounce as this rolling fairway can offer a nasty kick off line. Pick your approach wisely as shorter hitters may get caught out by the dip short of the green. A neat pot bunker guards the front right of the green so an approach middle-to-left of the green is ideal.
| Par | Yards | S.I |
|---|---|---|
| 4 | 448 | 5 |
| 4 | 418 | 5 |
| 4 | 408 | 5 |
| 4 | 291 | 13 |
Hole 6: Pond
A shorter par 3 that plays easier than it looks. While it looks narrow from the tee as the large bunkers left and right catch your eye, a committed tee shot to the central yardage will give you a great birdie opportunity, perhaps to get you on track after a testing opening five holes.
| Par | Yards | S.I |
|---|---|---|
| 3 | 145 | 17 |
| 3 | 145 | 17 |
| 3 | 137 | 17 |
| 3 | 148 | 17 |
Hole 7: Plateau
To lay up or to take it on? The choice is yours. A lay up to the right half of this two-tier fairway will give you the best look at this green. Pot bunker right and a well-positioned bank to the left adds to the trickery of this narrow entrance. Beware of going long as a trip to the sand may be looming.
| Par | Yards | S.I |
|---|---|---|
| 4 | 401 | 3 |
| 4 | 401 | 3 |
| 4 | 385 | 3 |
| 4 | 351 | 3 |
Hole 8: High
Hole 8 is one of the hardest tee shots at Scotscraig. The purple heather to clear on the right and a group of bunkers opposite both need to be navigated if you are to find the fairway. Check the pin position on this reverse two-tier green guarded by a large bunker and run aways either side. Give plenty of attention to your putt.
| Par | Yards | S.I |
|---|---|---|
| 4 | 422 | 7 |
| 4 | 404 | 7 |
| 4 | 389 | 7 |
| 4 | 318 | 5 |
Hole 9: Flagstaff
The first par 5 and a great birdie opportunity. Favour the left side of the fairway to stay clear of bunkers, gorse and trees. Longer hitters think twice as the fairway narrows the further you go. Undulating slopes middle to left and short make running the ball in tricky. Play past the front yardage of the green and hopefully you’re left with a nice putt on this large green with a spine across the centre.
| Par | Yards | S.I |
|---|---|---|
| 5 | 484 | 11 |
| 5 | 484 | 11 |
| 5 | 470 | 11 |
| 5 | 402 | 15 |
Hole 10: Cricket
A gentle par 4 to start your back nine, with a wider fairway than you have already experienced. However, be aware of the small collection of bunkers up the right, and stay left if you can. A small bank sits at the front of this green which can kick your ball unexpectedly forward so carefully plan your club selection to this large flat green.
| Par | Yards | S.I |
|---|---|---|
| 4 | 404 | 12 |
| 4 | 404 | 12 |
| 4 | 386 | 12 |
| 4 | 359 | 10 |
Hole 11: Shanwell
Statistically one of our hardest holes, this long dogleg right par 4 requires a strong tee shot up the left hand side, avoiding the large bunker up the right. If you can get to the green, favour the right-hand side and for those who require a lay-up, take note of the burn running along the bottom of the fairway. A flatter green with some subtle breaks so keep an eye out.
| Par | Yards | S.I |
|---|---|---|
| 4 | 453 | 4 |
| 4 | 453 | 4 |
| 4 | 442 | 4 |
| 5 | 434 | 14 |
Hole 12: Rushes
Popular bunkers left and trees to the right, take care with a tee shot which looks straightforward. On a windy day your ball can be carried far right after it whizzes past the tree line off the tee. A tricky approach requires good club selection and trust to carry the gaping bunkers and unknown terrain between the sand and the green. Take your opportunity on this green – birdies and one putts can be had.
| Par | Yards | S.I |
|---|---|---|
| 4 | 393 | 8 |
| 4 | 393 | 8 |
| 4 | 379 | 8 |
| 4 | 375 | 4 |
Hole 13: Island
Although short, this tee shot requires a good line otherwise you’ll be stuck in the ditch that surrounds this island green. The green slopes from back to front and left to right, so for any putts from below the hole, make sure you give it a good belt.
| Par | Yards | S.I |
|---|---|---|
| 3 | 165 | 18 |
| 3 | 165 | 18 |
| 3 | 150 | 18 |
| 3 | 106 | 18 |
Hole 14: Garpit
A long par 5 that requires two good hits to get there in two but for anyone eager to give it a crunch, beware of Garpit House and the horse field to the right. Nothing wrong with a lay-up favouring the left side here to open up the green that slopes consistently from back to front. Oh, and out of bounds awaits to the right and long of the green.
| Par | Yards | S.I |
|---|---|---|
| 5 | 516 | 2 |
| 5 | 516 | 2 |
| 5 | 505 | 2 |
| 5 | 470 | 2 |
Hole 15: Burn
This tough par 3 with OB right requires both precise distance control and accuracy. The sharp slope at the front of the green will guide your ball towards the hazard, so make sure you take enough club. A two-tier green with many big breaks deserves respect; try not to get too greedy or you could leave the green red-faced.
| Par | Yards | S.I |
|---|---|---|
| 3 | 175 | 14 |
| 3 | 175 | 14 |
| 3 | 163 | 14 |
| 3 | 136 | 16 |
Hole 16: Railway
A tee shot here with a touch of left to right movement will suit the dog leg, as long as you avoid the fairway bunker on the right. A well-positioned lay up short of the two bunkers will give you the chance to stick one close. Big hitters – have a go in two but favour left as OB is all down the right. Bear in mind – the green slopes towards the road.
| Par | Yards | S.I |
|---|---|---|
| 5 | 476 | 6 |
| 5 | 476 | 6 |
| 5 | 464 | 6 |
| 5 | 462 | 6 |
Hole 17: Road
Another tight tee shot with trees left and bunkers right. Aim to keep inside the bunker line or be blocked out by the overhanging branches if you veer too far left. A wide but shallow green will require good distance control; look to keep to ball below the hole for a nice uphill put. Run off all around the green makes for a tricky up and down so middle of the green is perfect.
| Par | Yards | S.I |
|---|---|---|
| 4 | 401 | 10 |
| 4 | 377 | 10 |
| 4 | 363 | 10 |
| 4 | 333 | 8 |
Hole 18: Home
A chance to finish on a high. A forgiving fairway, but your ideal line will be left of centre as there is a dangerous bunker lurking up the right. A well-guarded green with three bunkers well positioned at the front and sides. Aim directly over the middle bunkers to a middle yardage and leave yourself a nice putt to any pin location. Watch for the subtle breaks on this green, especially on the right-hand side.
| Par | Yards | S.I |
|---|---|---|
| 4 | 430 | 16 |
| 4 | 396 | 16 |
| 4 | 376 | 16 |
| 4 | 331 | 12 |